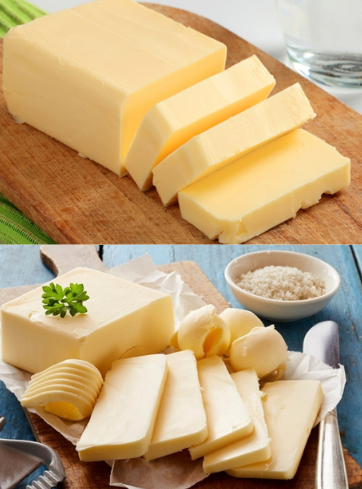
What if I told you that you could make rich, creamy butter at home using just one simple ingredient? No chemicals. No preservatives. No hidden salt or additives. Just pure, wholesome butter that tastes better than anything you’ll find in a store. And the best part? It takes less time than a trip to the supermarket.
Welcome to the beautiful world of homemade butter—where simplicity meets flavor, and where your kitchen becomes the place magic happens.
Why Homemade Butter Is Worth the Hype
Let’s be real. Most store-bought butter is loaded with stuff you don’t need—preservatives, stabilizers, artificial coloring, and more salt than you’d ever sprinkle on toast. But when you make butter at home, you control every single part of the process.
It’s fresher, cleaner, and healthier, not to mention a whole lot more fun. And yes—it really only takes one ingredient.
The Only Ingredient You Need
So, what’s the secret to this magical, spreadable gold?
- Heavy Cream (also known as whipping cream) – Make sure it’s cold and contains at least 30% fat
- Optional: A pinch of sea salt, or for the adventurous, add-ins like garlic, herbs, or honey
That’s it. No fancy gadgets. No rare ingredients. Just cream—and a little time.
Method 1: Make Butter with a Mixer or Blender
This is the fastest and easiest way to make butter if you’ve got a kitchen appliance that does the hard work for you.
Step-by-Step Instructions:
- Pour cold heavy cream into your blender or stand mixer. Fill only halfway so there’s room to whip.
- Turn it on to medium-high speed and watch the magic begin.
- In a few minutes, it’ll turn into whipped cream. Keep going!
- After 5–10 minutes, you’ll see it start to separate into two parts: a clump of yellow butter and a milky liquid—that’s buttermilk.
- Strain the buttermilk and set it aside (don’t toss it—it’s perfect for pancakes!).
- Now rinse the butter under cold water, gently kneading it with a spoon or spatula to get rid of any remaining buttermilk. This step helps it last longer.
- Pat it dry with a paper towel, shape it, and store it in an airtight container in the fridge.
Video : Homemade Butter | Salted and Unsalted Butter | Ready 15 Minutes.
Method 2: Shake It by Hand (Old-School and Fun!)
Don’t have a blender? No problem. Your arms are the original kitchen tools.
Here’s how:
- Pour heavy cream into a clean glass jar, filling it only halfway.
- Seal the lid tightly and get ready to shake.
- Shake it vigorously for 10–15 minutes. You’ll feel the cream thicken and then suddenly start sloshing—that’s when the butter has separated!
- Open the jar, strain out the buttermilk, rinse the butter, and store as above.
It’s a fantastic arm workout, and kids love helping with this one. Plus, there’s something extra satisfying about shaking your way to butter.
Why Homemade Butter Is Healthier
Let’s talk health perks for a sec. Store-bought butter often includes:
- Preservatives to extend shelf life
- Artificial coloring for that yellow hue
- Excess salt or fillers that you never asked for
With homemade butter, you get:
- No preservatives or dyes
- Complete control over salt and flavor
- Freshness and nutrients that haven’t been processed away
- The option to use organic or grass-fed cream for even better nutrition
In short: what you see is what you get. Clean, real food.
How to Store Your Homemade Butter
Like any fresh food, homemade butter won’t last forever—but it keeps well if you store it right.
- Store in an airtight container in the fridge for up to 1 week
- For longer storage, divide into small portions and freeze
- Add a pinch of salt to help extend shelf life naturally
You’ll find that it holds its flavor beautifully and stays spreadable right out of the fridge.
Creative Ways to Use Homemade Butter
Butter isn’t just for toast (though let’s be honest—it shines there too). Once you’ve made your own, you’ll want to use it in everything.
Try it in:
- Warm toast, muffins, pancakes, or fresh bread
- Mashed potatoes or roasted vegetables
- Scrambled eggs or omelets for a silky finish
- Cookies, cakes, or pie crusts where butter really matters
- As a base for compound butters (think: garlic herb, cinnamon honey, or lemon dill)
Once you start cooking with it, you’ll realize how much flavor store-bought butter lacks. Yours will taste richer, creamier, and fresher every time.
Pro Tips for First-Time Butter Makers
- Always start with cold cream for better results
- Don’t skip the rinsing step—it makes a huge difference in freshness
- If adding flavors, do so after the butter has formed and been rinsed
- Save that buttermilk—it’s liquid gold for baking
You can even double or triple your batch and freeze half to have homemade butter ready whenever you need it.
Video : Homemade Butter | Make Amul Butter
Conclusion: One Ingredient, Endless Satisfaction
Who knew one humble ingredient could create something so luxurious? Making butter at home is one of those simple joys that feels like a win every time. It’s affordable, healthier, and just straight-up delicious. Whether you whip it in a blender or shake it in a jar, the end result is always the same: pure, creamy butter you’ll be proud to spread.
So go ahead—grab that heavy cream and get started. One ingredient. A few minutes. And a whole lot of buttery goodness. 🧈💛